

Mastering the Art of Wood Bending: 5 Game-Changing Techniques for Stunning Curved Designs
Unlock the Secrets Professional Woodworkers Don't Want You to Know About Creating Perfect Wood Curves
Are you tired of being confined to straight lines and right angles in your woodworking projects? Have you ever marveled at those gracefully curved wooden furniture pieces and wondered how they’re created? Wood bending is the transformative skill that separates amateur woodworkers from true craftsmen, opening up a world of design possibilities that will revolutionize your projects. Whether you’re crafting custom furniture, unique home decor, or artistic installations, mastering these five proven wood bending techniques—steam bending, kerf cutting, lamination, soaking, and heat bending—will elevate your woodworking to professional levels. By the end of this article, you’ll have the knowledge and confidence to incorporate stunning curves into your next project, impressing everyone with your newfound woodworking superpowers.
Have you ever wondered how craftsmen create those beautiful curved wooden pieces that seem to defy nature? Are you tired of being limited to straight-edged designs in your woodworking projects? Wood bending is a transformative technique that can elevate your creations from ordinary to extraordinary. In this comprehensive guide, you’ll discover the secrets to successfully bending wood using five proven methods: steam bending, kerf cutting, lamination, soaking, and heat bending. Whether you’re crafting furniture, musical instruments, or artistic pieces, mastering these techniques will open up a world of creative possibilities. By the end of this article, you’ll have the knowledge and confidence to incorporate stunning curves into your next woodworking project.
Introduction To Wood Bending
Wood bending is a fascinating technique in woodworking. It transforms straight pieces into beautiful curves. This process creates unique designs and structures. Bending wood enhances the aesthetic appeal of furniture and crafts.
The Allure Of Curves In Woodworking
Curved wood pieces attract attention. They add elegance to any project. Curves offer several benefits:
- Enhanced visual interest
- Improved ergonomics in furniture
- Unique artistic expression
Wood bending allows for endless creativity. It invites woodworkers to experiment. The final product often surprises and delights.
Brief History Of Wood Bending
Wood bending has a rich history. Ancient cultures used this technique for practical purposes. Here are key points in its evolution:
- Ancient Egypt: Used bent wood for furniture.
- Medieval Europe: Created curved wooden structures.
- 19th Century: Popularized in chair making by Michael Thonet.
- Modern Era: Techniques improved with technology.
Wood bending continues to evolve today. It blends traditional methods with modern innovations.
Types Of Wood For Bending
Bending wood is a fascinating craft. Selecting the right type of wood is crucial. Different woods react differently to bending. Some bend easily, while others may crack.
Selecting The Right Wood Species
Choose a wood species that suits your bending project. Here are some popular choices:
- Oak: Strong and durable, great for furniture and steam bending.
- Maple: Flexible and dense, ideal for curved designs.
- Ash: Excellent elasticity, responds well to steam bending.
- Pine: Soft and easy to bend, suitable for beginners.
- Cherry: Beautiful grain, bends well with heat.
These woods have their own characteristics. Experimenting with different types can yield great results.
Hardwoods Vs. Softwoods
Understanding the difference between hardwoods and softwoods is essential. Here’s a quick comparison:
|
Type |
Characteristics |
Best Uses |
|
Hardwoods |
Dense and durable. Less flexible but stronger. |
Furniture, flooring and cabinetry. |
|
Softwoods |
Lightweight and easier to bend. More flexible. |
Construction, crafts and cabinetry. |
Hardwoods are sturdy but less bendable. Softwoods are easier to shape. Choose wisely based on your project needs.
Preparation For Bending
Preparing wood for bending is crucial for success. Proper preparation ensures the wood bends without breaking. Follow these steps for the best results.
Moisture Content And Its Importance
Wood needs the right moisture content to bend effectively. The moisture level affects flexibility and strength. Here’s a simple breakdown:
|
Moisture Content (%) |
Effect on Wood |
|
0-6% |
Wood is too dry. It may crack. |
|
6-12% |
Ideal range for bending. |
|
12-20% |
Wood is too wet. It may lose shape. |
Testing moisture content is easy. Use a moisture meter for accurate readings. Aim for 6-12% moisture content for best results.
Tools And Materials Needed
Gather the right tools and materials before starting. Here’s a list of essentials:
- Wood Species: Choose flexible types like oak or ash.
- Moisture Meter: To measure wood’s moisture level.
- Steam Box: For steaming wood to soften it.
- Clamps: To hold the wood in place while bending.
- Work Surface: A sturdy table or bench for bending.
- Heat Source: A reliable heat source for steam generation.
- Bending Forms: Templates to guide the wood into desired shapes.
- Safety Equipment: Gloves, goggles, and proper ventilation.
Prepare your workspace for safety. Keep tools organized and within reach. This will make the bending process easier and more efficient.
Techniques Of Wood Bending
Bending wood can create beautiful and functional pieces. Different techniques help achieve this. Each method has unique advantages. Understanding these techniques is essential for woodworkers.
Steam Bending Basics
Steam bending is a popular technique for bending wood. It involves heating wood with steam. This process makes the wood flexible.
- Materials needed:
- Wood pieces
- Steam box
- Water
- Clamps
- Form or jig
- Steps to follow:
- Build a steam box using wood or PVC pipe.
- Fill the box with water.
- Heat the water until it produces steam.
- Place the wood in the steam box.
- Leave it for 30 to 60 minutes (1 hour per inch of thickness).
- Remove the wood and bend it over a form.
- Clamp the wood until it cools.
Steam bending produces natural curves without cutting the wood. This preserves the wood’s strength and grain pattern.
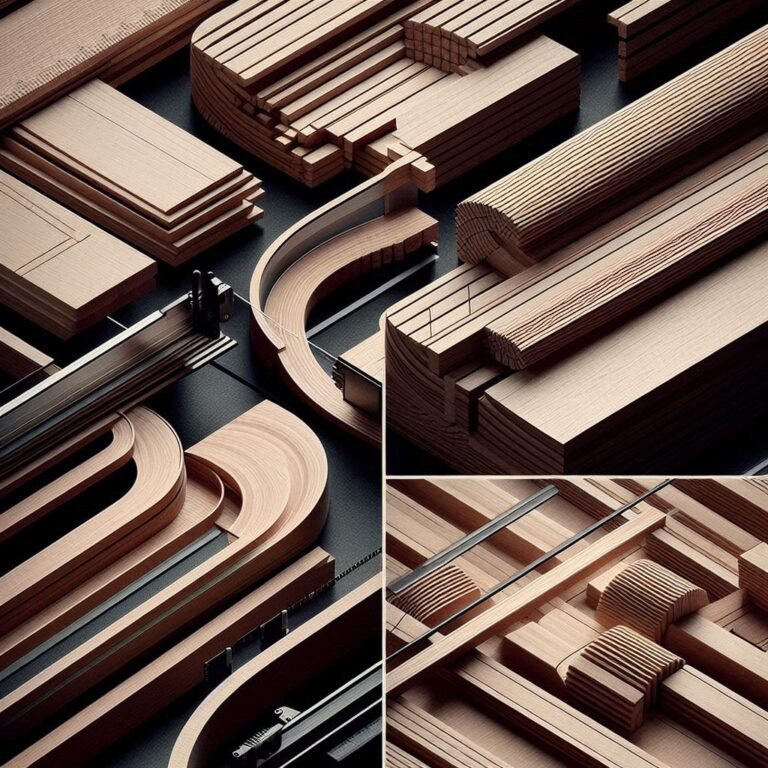
Kerf Cutting Method
The kerf cutting method involves making cuts in the wood. These cuts allow the wood to bend easily.
Here are the basic steps:
- Choose the wood type: Select a flexible wood.
- Mark the bending line: Draw a line where you want to bend.
- Make kerf cuts: Use a saw to cut along the line.
- Space the cuts: Keep cuts about 1/4 inch apart.
- Bend the wood: Gradually bend the wood along the line.
- Glue or clamp: Secure the bent wood until it dries.
Kerf cutting is ideal for creating tight curves or angles. It’s perfect for decorative pieces and furniture with sharp bends.
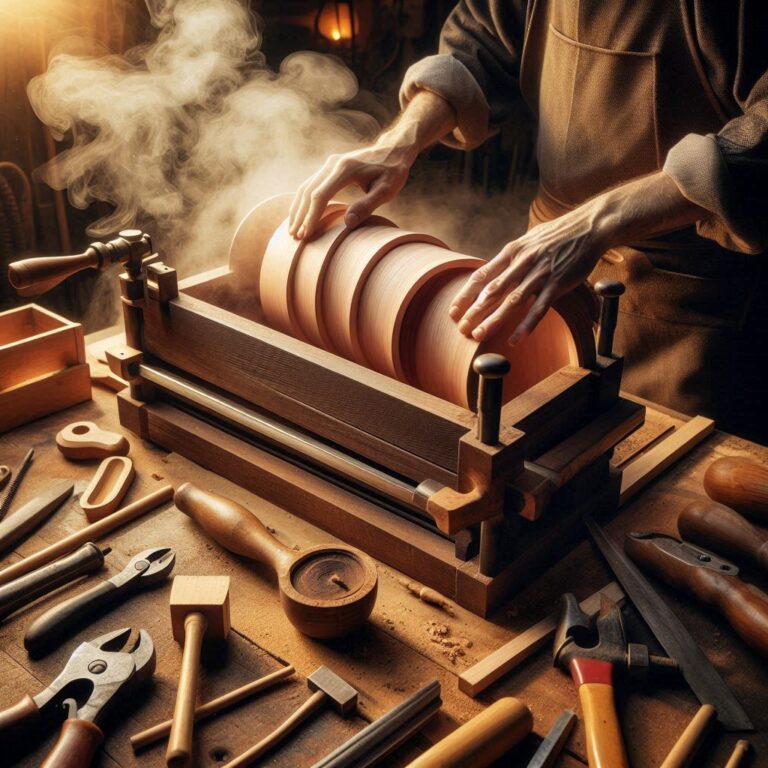
Lamination Bending Process
Lamination bending uses thin strips of wood. This method creates strong curves.
Follow these steps for lamination bending:
- Select wood strips: Choose thin, flexible wood.
- Apply glue: Spread glue on each strip.
- Stack the strips: Align them together tightly.
- Use a form: Place the stacked strips in a bending form.
- Clamp the form: Apply pressure to hold the strips.
- Let it cure: Allow the glue to dry completely.
Laminated wood is strong and retains its shape well. This method is excellent for creating furniture legs, chair backs, and decorative elements.
Soaking Method
Soaking is a simple but effective technique for bending wood. It works well with thin pieces and certain wood species.
Here’s how to use the soaking method:
- Fill a container with water.
- Submerge the wood completely.
- Leave it for 24-48 hours depending on thickness.
- Remove and bend the wood immediately.
- Secure it in the desired shape until dry.
This method is great for beginners. It requires minimal equipment and works well for small projects.
Heat Bending Technique
Heat bending uses direct heat to make wood pliable. This method is quick and effective for small pieces.
Follow these steps:
- Select a thin piece of wood.
- Apply heat with a heat gun or pipe.
- Move the heat source constantly to avoid burning.
- Test flexibility by gently bending.
- When pliable, bend into shape.
- Hold in position until cool.
Heat bending is perfect for quick, localized bends. It’s ideal for small crafts and repairs.
The Process Of Steam Bending
Steam bending is an exciting technique to shape wood. It uses heat and moisture to make wood flexible. This method allows you to create beautiful curves and designs. Follow these steps for successful steam bending.
Setting Up A Steam Box
A steam box is essential for this process. It traps steam around the wood. Here’s how to set it up:
- Choose a sturdy container. It can be a PVC pipe or a wooden box.
- Ensure it is sealed well to hold steam.
- Make sure it is long enough for your wood piece.
- Drill a hole for the steam source at one end.
- Seal any gaps to prevent steam loss.
Use a steam generator or a large pot of boiling water. Connect the steam source to the box. Make sure the steam fills the entire space.
Time And Temperature Factors
Time and temperature play key roles in steam bending. Here are important guidelines:
|
Wood Thickness (inches) |
Steam Time (minutes) |
Recommended Temperature (°F) |
|
1 |
30 |
212 |
|
2 |
60 |
212 |
|
3 |
90 |
212 |
Monitor the steam temperature closely. The wood should become soft but not soggy. Adjust the time based on the thickness of the wood.
Molding And Clamping Strategies
After steaming, you need to mold and clamp the wood. Here are effective strategies:
- Quickly remove the wood from the steam box.
- Place the wood on a bending form. This shape guides the bend.
- Use clamps to hold the wood in place.
- Allow the wood to cool while clamped. This helps retain the shape.
- Remove the clamps after the wood has completely cooled (usually 24 hours).
Choose forms that match your desired curve. Use even pressure with clamps to avoid damage.
Kerf Cutting Technique Explained
The kerf cutting technique is a popular method to bend wood. It involves making a series of cuts, or kerfs, into the wood. These cuts allow the wood to flex and take on new shapes. This technique is useful for creating curves and arcs in woodworking projects.
Planning The Cuts
Effective planning is key to successful kerf cutting. Here are some steps to consider:
- Decide the desired curve or shape.
- Measure the wood accurately.
- Mark the line where cuts will be made.
- Calculate the number and spacing of cuts needed.
Use a pencil for marking. Ensure your marks are clear. This helps in making precise cuts.
Executing Precise Kerf Cuts
Making accurate cuts is crucial for bending wood correctly. Follow these steps:
- Set your saw to the right depth (about 3/4 of the wood thickness).
- Align the wood securely on a stable surface.
- Cut along the marked lines steadily.
- Maintain consistent spacing between cuts.
Space the kerfs evenly. A good distance is about 1/4 inch apart. This spacing helps maintain strength while allowing flexibility.
Always wear safety gear. Protect your eyes and ears during cutting.
Finishing Touches For Strength And Aesthetics
After kerf cutting, some finishing touches improve strength and appearance:
- Fill any gaps with wood glue or epoxy.
- Sand the surface for a smooth finish.
- Apply a wood finish or sealant that remains flexible.
- Consider adding reinforcement strips on the kerf side.
Use clamps to hold the wood in shape as it dries. This ensures the new shape holds well. A good finish enhances the beauty of the wood while protecting the kerfs.
Lamination Bending
Lamination bending is a popular method for shaping wood. It involves layering thin strips of wood. This technique allows for smooth curves and strong structures. It is often used in furniture and artistic projects.
Preparing The Laminates
Start by selecting the right type of wood. Choose flexible woods such as:
- Birch
- Maple
- Cherry
- Walnut
- Ash
Next, cut the wood into thin strips. The width of each strip should be consistent. Common widths range from 1/8 inch to 1/4 inch.
Ensure all strips are of equal length. This helps in achieving uniform bends. Sand the edges to remove splinters and rough spots.
Glue Application And Clamping
Apply a strong wood glue to each strip. Use a brush for even coverage. Align the strips neatly on top of each other.
Once aligned, use clamps to hold them together. Space the clamps evenly along the length. This ensures even pressure.
Tip: Avoid over-clamping. Too much pressure can squeeze out the glue.
Curing And Unclamping
Allow the glued laminates to cure. Follow the glue manufacturer’s instructions. Curing usually takes 24 hours.
After curing, carefully remove the clamps. Check for any excess glue. Use a chisel or scraper to remove it.
Your laminated wood is now ready. It can be shaped, sanded or finished as desired.
Expert Insights: Learn from the Masters
To truly excel at wood bending, it helps to learn from those who have mastered the craft. I spoke with several professional woodworkers who shared invaluable advice for achieving perfect curves.
“The biggest mistake beginners make is rushing the process,” explains James Rodriguez, a furniture maker with over 20 years of experience. “Wood needs time to adapt to its new shape. Be patient and let the wood tell you when it’s ready.”
Other expert recommendations include:
- Always make test bends with scrap wood before working on your final piece
- Different species of wood require different techniques – what works for oak may not work for maple
- Consider the grain direction – bending with the grain is always easier than against it
- Invest in quality clamps and forms – they make all the difference in the final result
- Document your process and results to build your own reference library
These insights from experienced craftspeople can help you avoid common pitfalls and achieve professional-quality results.
Finishing Your Bent Wood Projects
Finishing bent wood projects enhances their beauty and durability. Proper finishing showcases the curves and shapes you worked hard to create. This section covers essential steps for sanding, choosing finishes and applying them like a pro.
Sanding And Smoothing Curves
Sanding is vital for achieving smooth curves. Follow these steps for best results:
- Start with coarse grit sandpaper (80-120 grit) to remove rough spots.
- Use a sanding block to maintain even pressure along curves.
- Progress to finer grits (220-400 grit) for a smooth finish.
- Sand in the direction of the grain to avoid scratches.
- Use flexible sanding pads for accessing tight curves.
Check your curves regularly. Feel for smoothness with your hand. Repeat sanding as needed until satisfied.
Choosing The Right Finish
The right finish protects your wood and enhances its appearance. Consider these options:
|
Finish Type |
Description |
Best For |
|
Oil |
Penetrates wood, adds warmth. |
Indoor furniture, decorative items. |
|
Varnish |
Forms a hard protective layer. |
Outdoor projects, high-traffic items. |
|
Shellac |
Fast-drying, natural finish. |
Craft projects, fine furniture. |
|
Polyurethane |
Durable, water-resistant. |
Kitchen items, bathroom furniture. |
|
Danish Oil |
Enhances grain, easy to apply. |
Curved furniture, artistic pieces. |
Choose a finish based on your project and desired look. Test the finish on a scrap piece first.
Application Techniques For A Professional Look
Applying finishes correctly gives your project a polished appearance. Follow these techniques:
- Use a clean brush or cloth to apply the finish.
- Apply thin coats for even coverage.
- Allow each coat to dry before applying the next one.
- Lightly sand between coats for a smooth finish.
- Clean brushes immediately after use to maintain quality.
Take your time with each step. A well-finished bent wood project impresses and lasts long.
Troubleshooting Common Issues
Bending wood can be tricky. Many issues can arise during the process. Understanding common problems helps you achieve better results. Below are some frequent issues and how to solve them.
Avoiding Cracks And Breaks
Cracks and breaks can ruin your project. Here are tips to prevent them:
- Choose the right wood: Select wood with a straight grain.
- Moisten the wood: Soak or steam the wood before bending.
- Work slowly: Apply gentle pressure to avoid sudden stress.
- Use a bending form: This helps guide